
In the following guide I will take apart an Acer Aspire 4743 series laptop.
In my case the full model name is: Aspire 4743z-4861.
STEP 1.
Make sure it's turned off completely before starting the disassembly process.
Unlock and remove the battery.

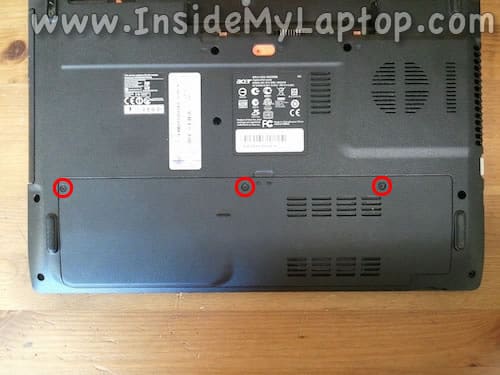
STEP 2.
Remove three screws securing the service cover on the bottom.
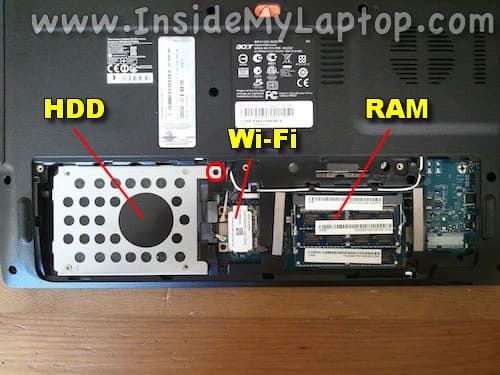
Lift up and remove the cover.
Under the cover you will find the hard drive, wireless card and both RAM modules.
Remove one screw securing the hard drive.
STEP 3.
Slide the hard drive to the left to disconnect it from the motherboard.
Remove the hard drive assembly from the laptop.

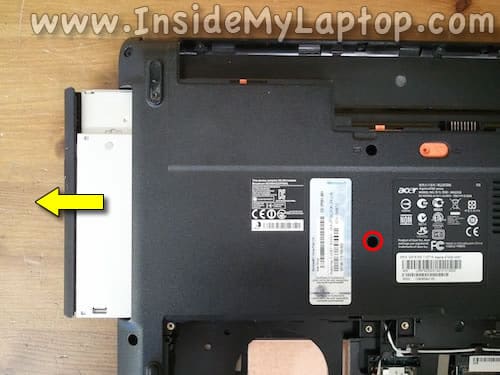
STEP 4.
Remove one screw securing the optical drive.
Pull the drive to the left and remove it from the case.
STEP 5.
Remove two screws securing the keyboard.

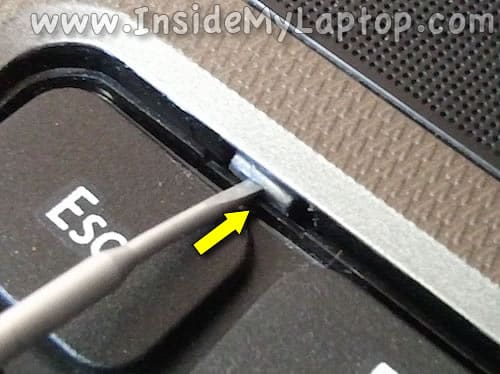
STEP 6.
There are five latches securing the keyboard to the top cover.
Push on the latch with a small screwdriver until it moves into the case.
When the latch pushed in, the keyboard will lift up a little bit and the latch will not be able to lock back in.
Do the same with all remaining latches.
STEP 7.
Separate the keyboard from the top cover and turn it upside down. Place on the palm rest.

STEP 8.
Now you can access the keyboard cable connector, unlock it and release the cable.
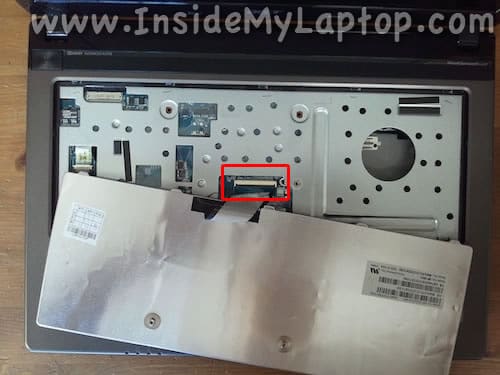
STEP 9.
Lift up the left side of the retaining tab until it opens up at a 90 degree angle (green arrow).
Pull the cable out of the connector (yellow arrow).
Now you can remove the keyboard completely.

STEP 10.
Remove shown screws from the bottom case.

STEP 11.
Remove one screw securing the top cover (palm rest) assembly.
Disconnect the power button cable (left arrow).
Disconnect the touchpad connector (right arrow).

Unlock the connector by lifting up the retaining tab.

STEP 12.
Start separating the top cover assembly from the bottom case.
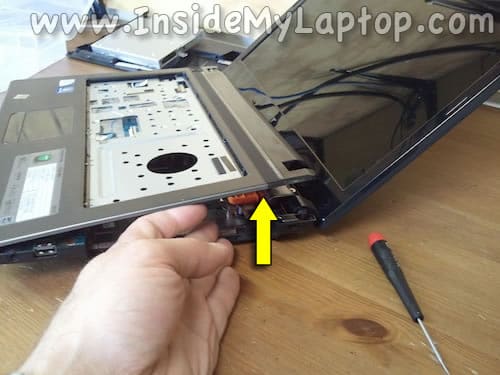
I'm using a guitar pick to separate two parts from each other.

STEP 13.
Remove the top cover.
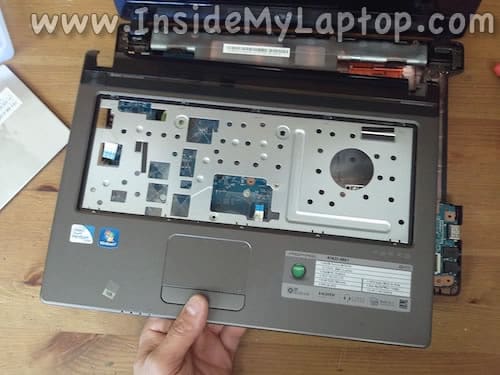
On the other side you can access both speakers, touchpad and power button board.

When the top cover removed you can access the CMOS battery and USB board.

STEP 14.
Before you can remove the motherboard from the case it's necessary to disconnect two antenna cables from the wireless card.

STEP 15.
Remove one screw securing the motherboard.
Disconnect the display cable and USB board cable.

Here's how to unplug the display cable.

STEP 16.
Start lifting up the motherboard on the right side.

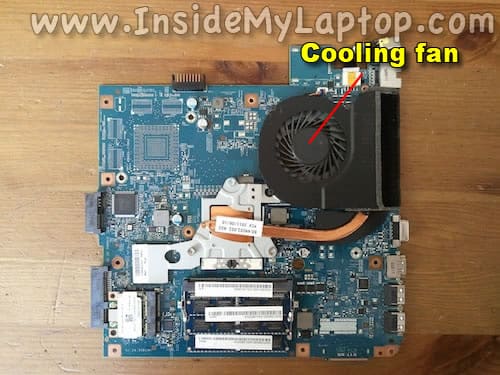
STEP 17.
Remove the motherboard from the case. It comes out with the power connector attached to it.

On the other side of the motherboard you can access the cooling fan and heat sink.
In Acer Aspire 4743 series laptops the power connector can be easily replaced.
Simply unplug the cable from the motherboard and replace with a new one.

sumber


0 komentar:
Post a Comment