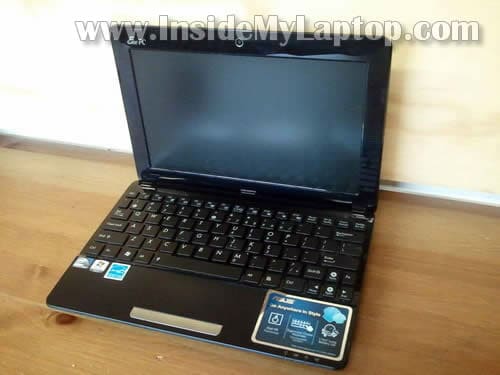
In this guide I show how to disassemble an Asus Eee PC1015PX netbook.
My main goal is replacing the hard drive which started to fail. In order to remove the hard drive it will be necessary to remove the top cover assembly. The hard drive mounted deep inside the netbook case.
Before you start make sure the netbook is turned off.
STEP 1.
Remove the battery.

STEP 2.
Lift up the screw cover located on the memory cover.
Remove the screw. Lift up and remove the memory cover.

STEP 3.
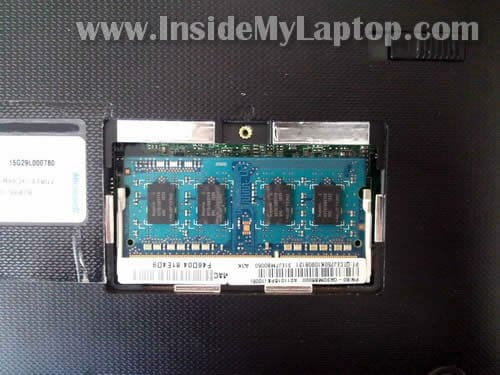
Under the cover you'll find one memory module.
Asus Eee PC 1015PX netbook has only one memory slot.
This laptop can take 2GB RAM maximum.
Memory type: DDR3 PC3-10600 or DDR3 PC3-8500.
STEP 4.
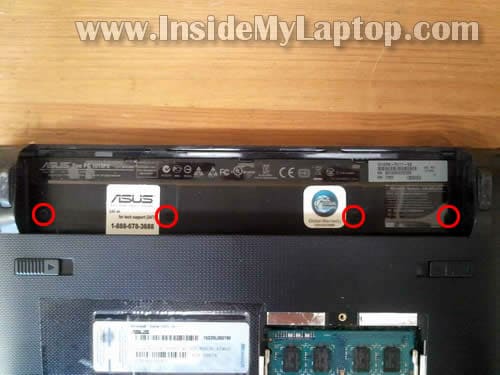
Remove four screws located in the battery compartment.
STEP 5.
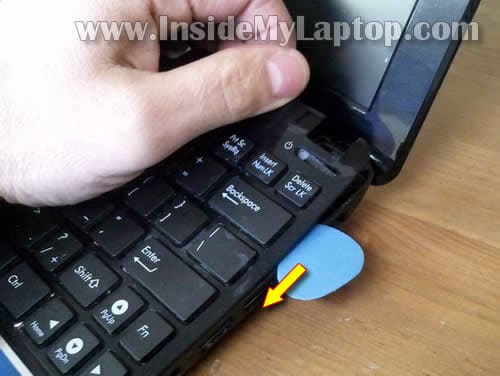
Start separating the keyboard assembly from the netbook base.
You can use a piece of soft plastic to separate two parts (I"m using a guitar pick).
There are small plastic latches securing the keyboard assembly.
STEP 6.
Lift up the top side of the keyboard assembly and slide it towards the screen.
Be careful. The keyboard still connected to the motherboard.

STEP 7.
Now you can access the keyboard cable connector which is located under the keyboard.
Before removing the keyboard you'll have to unlock the connector and release the cable.
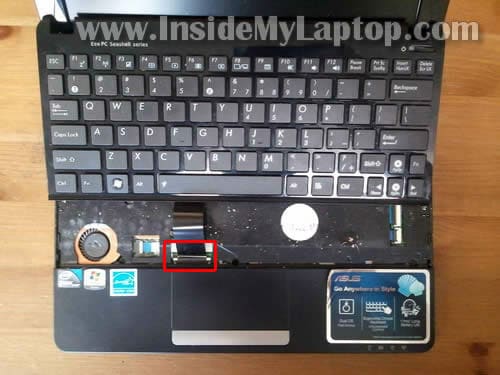
STEP 8.
Here's how to unlock the keyboard cable connector.
Move the white locking tab about 1 millimeter towards the netbook display.
The locking tab must stay attached to the connector base.
The cable jammed between the locking tab and base.

STEP 9.
On the following picture the connector shown in the unlocked position.
Now the cable is released and you can pull it from the connector.

STEP 10.
Remove the keyboard assembly.
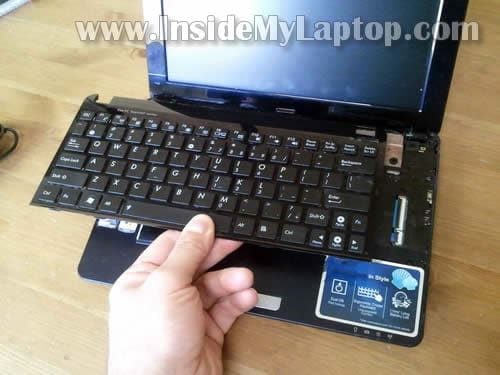
STEP 11.
Remove all screws securing the top cover assembly.
Disconnect the touchpad cable.
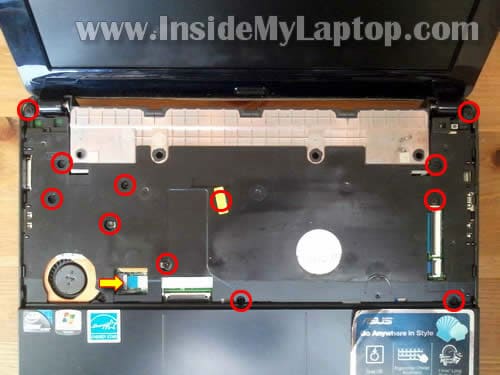
STEP 12.
Here's how to unlock the touchpad connector.
Lift up the right side of the white locking tab with your fingernail.
The locking tab will open up at a 90 degree angle. The locking tab must stay attached to the connector base.
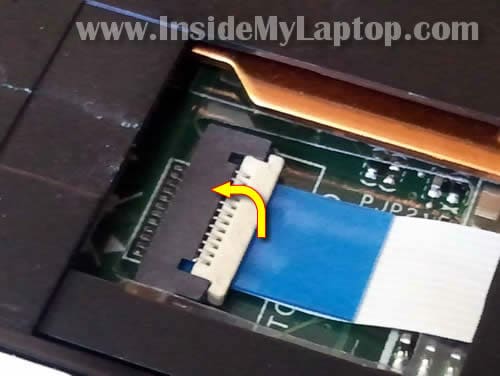
STEP 13.
On the following picture the same connector shown in the unlocked position.
Now you can pull the touchpad cable from the connector.

STEP 14.
Start separating the top cover assembly from the netbook base.
I'm using the same guitar pick as a case cracker.

STEP 15.
Remove the top cover assembly.
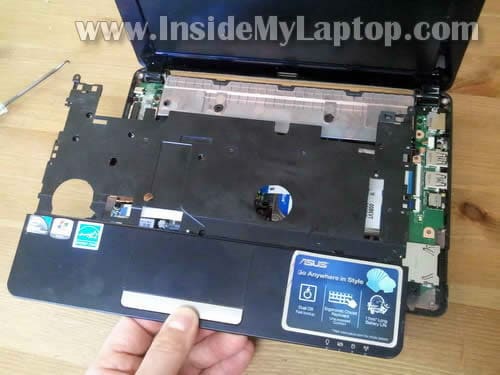
STEP 16.
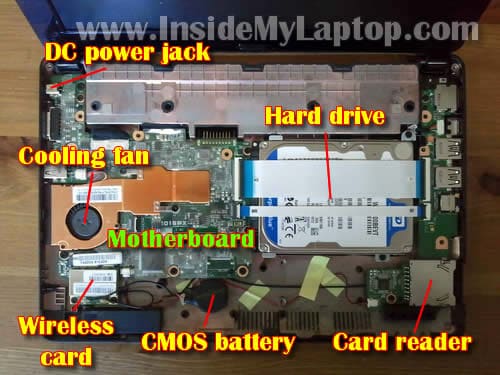
Under the top cover you can access the following internal parts:
- Cooling fan.
- Wireless card.
- Hard drive.
- CMOS battery.
- Card reader/USB board.
As you see, in Asus Eee PC 1015PX netbook the DC power jack soldered to the motherboard. If the DC jack fails, it will be necessary to remove the motherboard for the jack repair.
While the top cover is removed, take a look inside the cooling fan. If the fan looks dusty, blow off the dust using canned air or air compressor.
STEP 17.
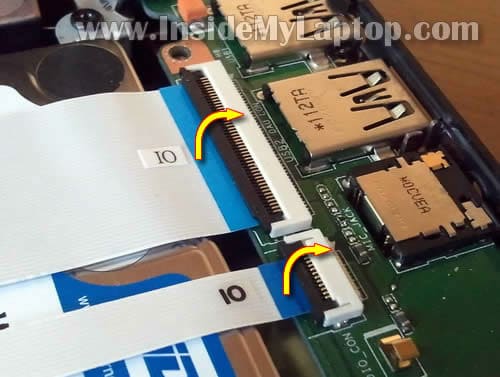
The hard drive mounted under two cables connecting the USB board with the motherboard.
Disconnect both cables from the USB board.
Unlock both connectors the same way you unlocked the touchpad connector in the step 12.
STEP 18.
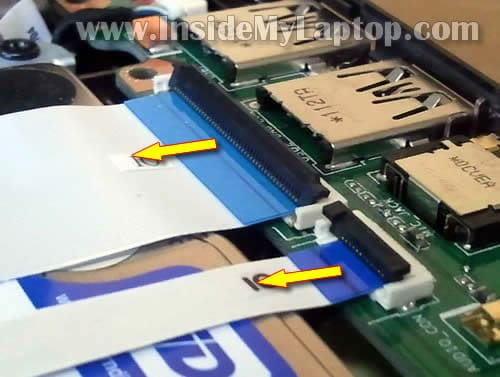
Remove both cables from connectors.
STEP 19.
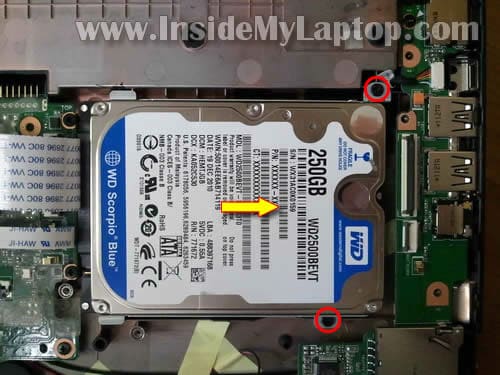
Remove two screws securing the hard drive.
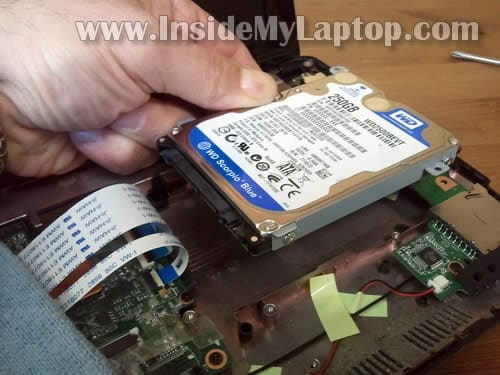
Lift up the right side of the hard drive and slide it to the right to disconnect the hard drive from the motherboard.
STEP 20.
The hard drive has been removed.
My Asus Eee PC 1015PX netbook had a regular 2.5″ 250GB SATA hard drive installed. You can replace it with any other large capacity 2.5″ SATA hard drive or SSD.


0 komentar:
Post a Comment